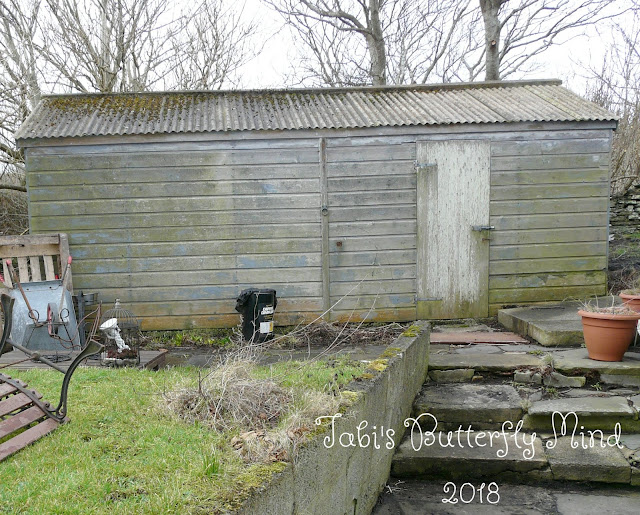
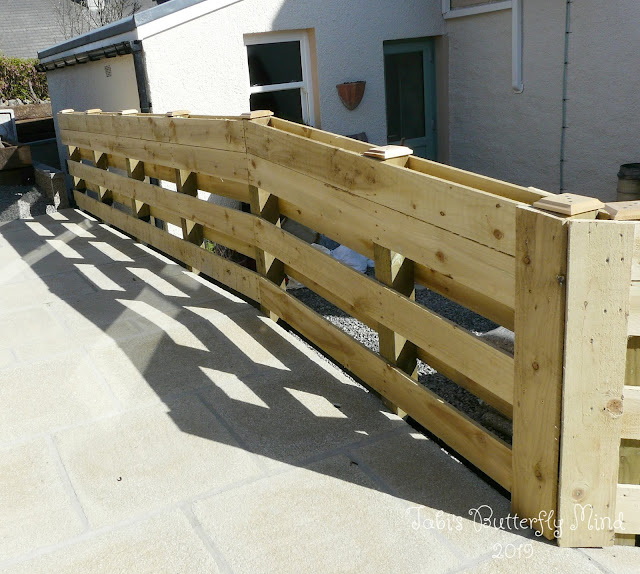
.....months of hard work makes! The back garden is a totally different place now. As I've mentioned previously, we really hadn't planned on doing any of this work, other than having a new craft shed/store room built, but it just seemed to grow organically when one issue after another needed to be rectified *sigh* As I'm sure you can imagine, a huge chunk has now been taken out of the renovations budget so it's going to take very much longer to complete the work on the rest of the house.
Just to warn you, my loves, this post is very photo-heavy!
Because the old shed was having to come down we had to have a new one for garden tools, etc. We bought this one from a chap who lives here in Stromness; Vernon and his merry band of helpers made the base for the shed and helped Murdo put it together in situ.
As you can see I stained the new shed in Cuprinol's Black Ash, which really helps it to "disappear" into the background. The pile of logs beside it is from the trees we had to have cut down in the front garden.
A levitating shed! This was a temporary measure whilst George and Dylan put down sturdy supports on concrete pads. I must try to remember to take another photo of the shed now that it has "landed" LOL
This was the view looking back towards the bathroom from where the new garden shed now stands. The ground here was held back by railway sleepers which were rotting away, so a lot of the soil had slipped down and was piled against the kitchen extension. The concrete base, which we think probably supported a water tank at some point, was also very close to both the kitchen and dining room walls. Water gathered in this area, which was causing dampness in the house.
A lot of soil had to be dug out (the story of our life with this garden!), the old water tank base was demolished, and George built a new retaining wall. The excess soil was piled up and retained with railway sleepers.
We've no idea what that concrete thing (to the right) is
but it was one of two that had been buried in the garden.
but it was one of two that had been buried in the garden.
This photo gives some idea of the different levels out here.
We had lots of pieces of granite which had been used to infill the water tank base, so Chris used some to build a raised bed between the garden shed and the log-store. Plus it gave us another area to "lose" a bit more of that excess soil! At the moment it's a temporary holding place for logs.
Vernon and Mark dug out this very old, neglected, flowering currant ~ and it was some task!
We now have another raised bed ~ and the sun can get through, too. All through this work, there has been the constant juggle between having the excess soil taken away in yet another skip or making some use of it. Either way there wasn't much difference in labour costs, which influenced our decision to have the raised beds put in.
The retaining wall behind this bed was actually in good condition, so George only had to extend it at either end. You can just about make out at the far end where the soil had fallen through the rotten sleepers. All the walls have now been rendered and harled.
These photos show how much higher most of the garden was, as well as the poor condition of the old retaining walls and steps.
We now have a safe walkway.....
.....from one level of the garden up to the next.
The fencing will all be stained over the coming weeks.
And yes, you've guessed it ~ another raised bed. Like I've said, there was an awful lot of soil to be dealt with out here!
I planned it so that there could be a "utility" area here. I'm thinking of putting my outdoor potting bench alongside the compost bin, plus bags of compost, etc. I'll take some more photos when I've decided LOL
These rosa rugosas were dug out of the front garden and "heeled-in" temporarily. They sure are tough old shrubs ~ look at all the new leaves bursting forth!
Another space was left at this end of the bed, which is where the bins will be corralled.
There were some ancient rhubarb plants here, along with some shrubs which had been planted right up against the wall ~ which, of course, had damaged it considerably. This section of wall came down when all the building work was going on in the garden. I was somewhat anxious about the big wall, too, as it's not looking too healthy.
I knew that at some point in the future I would like to have a greenhouse, and this area seemed a good place to put one. We were going to have to have the boundary wall rebuilt anyway, so the guys suggested building something really sturdy for the greenhouse at the same time, bearing in mind the strong winds we get here. It will be a number of years before we can justify the cost of having the upper part of a greenhouse built as there is still a lot of work to be done inside St Abbs, but at least the framework is in place. When the greenhouse has been built the walls will be rendered and the outside will be harled like the rest of the garden walls.
Dylan has tied in the new block wall at the back to the old existing wall and filled the cavity with rubble and concrete. He used leftover pieces of rock from the new boundary wall to close off the sides, and capped the top with more concrete blocks. You can see how much the old wall is leaning! Dylan also re-pointed the worst of the pointing on the existing wall, and also on the old boundary wall which runs alongside the shared access. We may well have to have more re-pointing done along there in the future.
Here's the lovely new stone wall Dylan built to replace the section which had to be demolished. It is tied-in to the concrete block wall on the other side.
This new wall is shorter than the original as we now have a pair of stone pillars either side of the gate.
The gateway into the garden from the shared access is wider than the original. It's good to have a decent sturdy gate in place ~ we don't have to worry about letting Matty out into the garden now.
The arbour seat we brought with us when we moved is now finally in the back garden after laying on the front lawn for over a year! I'm really looking forward to sitting out here in the summer, and pottering about in the sunshine 😊


No comments:
Post a Comment